How do I sync product updates to my store listings?
1. Go to Dashboard > Stores;
2. Choose the online store where the product was published and find the product;
3. Click the "Edit description" button;
4. After updating the product description, click the "Continue to publish" button.
Note that you cannot change the product variants(sizes & colors) unless you publish a new product.
Where can I manage my products?
Go to Dashboard > Stores > manage any of the following PODpartner products:
1. Products that you have published to your online stores;
2. Products that you have saved as drafts;
3. Products that failed to publish.
Can I order or publish a blank product to my store?
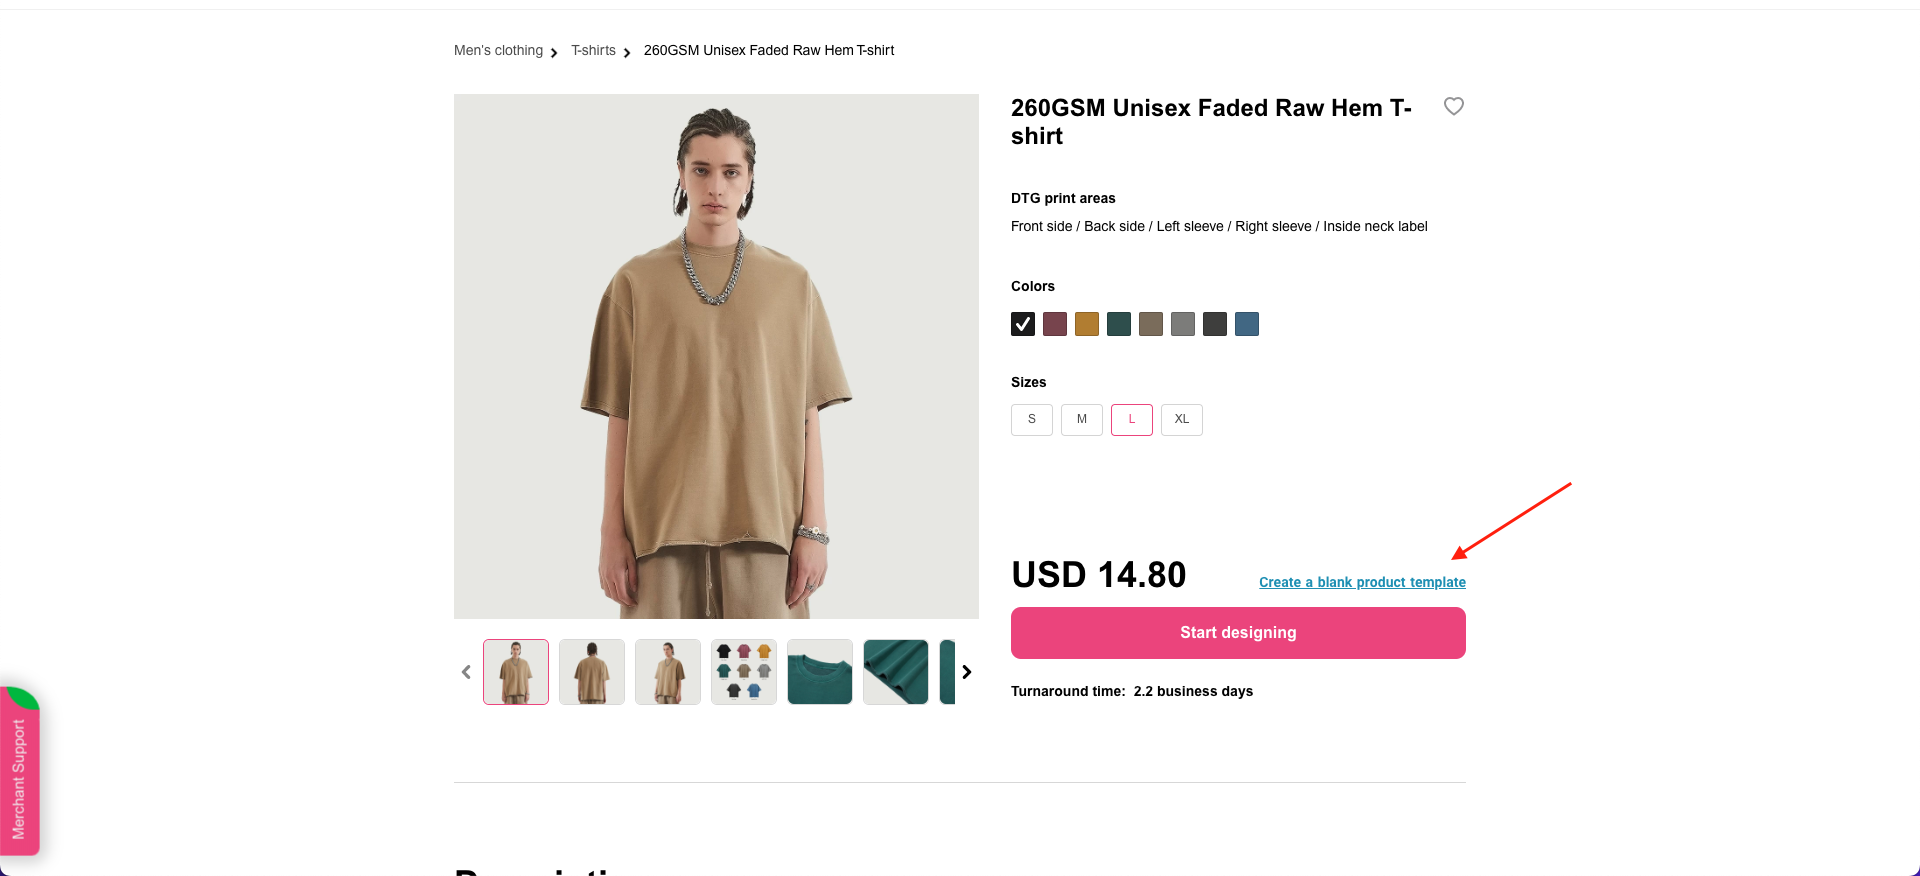
Yes. On each product page, there is an underlined text link saying “Create a blank product template” right above the “Start designing” button. Click the link, and then you can order a blank or add it to your store the same way with designed products.

How do I customize a neck label?
Follow these easy steps to create a unique neck label:
1. Go to Dashboard > Branding > Create neck label;
2. Upload your neck label file (usually containing your logo, country of origin, fabric, and care instructions);
3. Adjust the size and position of your file and determine how the letter size looks on the label. The letter size displayed on the label is "L" by default. The actual letter printed out will correspond to the size of the garment you order;
4. After you finish the neck label designs for both dark-colored and light-colored clothes, save them, and they will be ready to use when you customize a product.
If you don’t have a ready-to-use neck label design, try the following steps to quickly create a neck label in our Design Creator:
Open your product template
Upload an image file to the Inside Neck Label print area. The image could be a logo or anything that reminds people of your brand.
Do I have to create a neck label?
A unique neck label will leave a lasting impression on your customers and helps increase your brand awareness. Nonetheless you’re free to decide whether to create a neck label.
What do resolution and DPI mean?
Image resolution determines the size that your image will print. Typically, it's expressed as a horizontal x vertical pixel measurement. For example, an image resolution of 1920 x 1080 tells us that the image measures 1920 pixels in width and 1080 pixels in height. High resolutions mean more pixels, resulting in high-quality, crisp images.
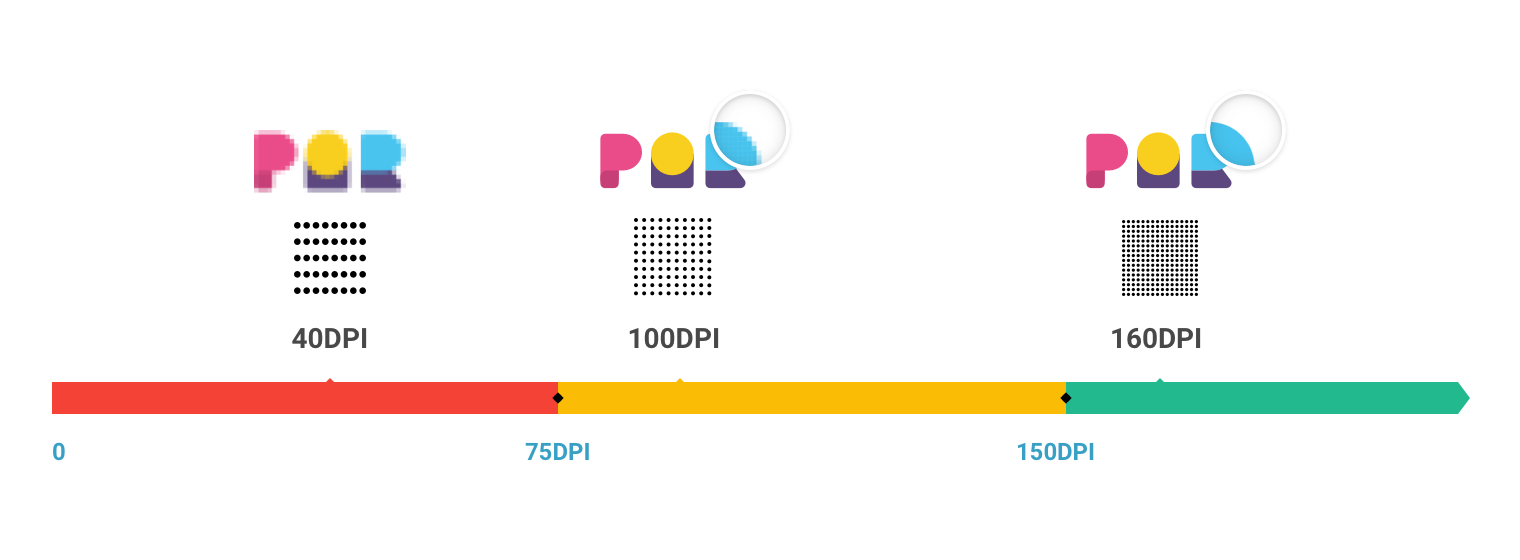
DPI stands for "Dots Per Inch", referring to the number of dots in a printed inch. A higher DPI image contains more dots, producing more image sharpness and detail, and the print quality will be higher accordingly. Vice versa, the lower the DPI, the blurrier the image. See the images below:

What is a neck label?
A neck label typically contains essential information about the garment required by law, including brand logos, garment size, fiber content, country of origin, and washing/care instructions. It could be printed or sewn on the inside neckline.
PODpartner currently only supports printed labels, which are the most popular due to their cost effectiveness, comfortable feeling, and flexibility.
A great way to make your brand stand out is to create a unique neck label. PODpartner's custom neck label feature allows you to submit your own neck label design and have it printed out along with the garment. Click here to learn how to customize a neck label on PODpartner.
Can I download the mockup images after I design a product?
Absolutely. After you save the product template, head to Dashboard > Product Templates > click on the template you want to download > enter the template detail page > click “Download mockups” on the right panel > select the image(s), color(s), and file format you want to download > click “Download mockups”.
Can you provide additional images of a product?
Yes. We provide plenty of free, high-resolution model images for you to download.
Navigate to Dashboard > Product Templates > click on the template you want to download > enter the product template detail page > scroll down and find all the model images of the product > select any of the images you want to download > hit “Download”.
How does PODparnter charge me for each print area?
Each print area may cost differently depending on which part of the garment it is. The price chart below shows the costs of individual print areas in different garment parts.

When you place designs to multiple print areas, the costs of each print area will be added to the final price.
That said, you won't be charged extra if only one print area is used on a garment.